To continue from the previous bat rep (here) which was game 1 of a tournament, game 2 I was pitted against a small Chaos army.
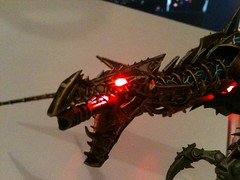
Heldrake image from http://www.warpstormlights.co.uk/
His list (minus upgrades) was:
Chaos Lord w/Mark of Khorne
Daemon Prince
5 Plague Marines - 1 Plasma gun
5 Khorne Berserkers
5 Khorne Berserkers
Forgefiend (Represented on my maps by a defiler)
2 Obliterators
The mission was once again Emperor's Will (2 objectives), with board edge deployment (technically it was Hammer and Anvil, but we were on 4'x4' boards).
Warlord traits were both not relevant - I got -1 to his reserves and he got Stealth in Ruins on a board with no ruins. For psychic powers, my Flyrant got Iron Arm, and Smite while the Tervigon got Warp Speed, Smite, and Enfeeble.
Deployment:
He then stole the initiative, which I was happy about.
Turn 1:
He moved up his forces as much as he could, though his obliterators were only able to move 2", slowing him down a bit. The Forgefiend and Obliterators did two wounds to the Tervigon while a couple bolters from the plague marines killed a few hormagaunts.
Bottom Turn 1:
For the second game in a row, the Tervigon crapped out in the first turn as she spawned a gant squad to camp on the objective. She also enfeebled the Khorne Berserkers and warlord. My right flank sprinted as fast as they could forward, my tyrant choosing to go all out with no targets in range. Finally, I forgot completely about my biovore and he sat in the woods, twiddling his thumbs, or whatever constitutes thumbs on a space bug.
Turn 2:
He continued advancing, leaving one squad of berserkers behind to hold his objective. The other berserkers were slowed by the difficult terrain from Enfeeble. The Obliterators and Forgefiend took the Tervigon down to one wound, while the plasma gun from the plague marines missed a killing shot. The deamon prince assaulted the gargoyles and chopped a bunch out of the air, making his save on the one wound they managed in return. Thankfully, Synapse kept them there, pinning the Daemon Prince in place after he was so kind as to carve out a Monstrous Creature sized gap for my Trygon.
Bottom Turn 2:
The flyrant looped around behind his forgefiend, hoping to take it down with shots to the rear armor and secure first blood. The devilgants continued to sprint up the right flank. The Tervigon managed to enfeeble the berserkers again, while the flyrant failed his Iron Arm roll with an 11. In the shooting phase, I remembered the biovore, but he missed, scattering 12" to the right. The flyrant did about 4 glances and three penetrating hits to the rear of the forgefiend, but he managed to make all but two of his daemonic saves, and the penetrating hit that got through was merely a shaken, which was ignored. In the assault phase, the hormagaunts charged the berserkers, hoping to soak overwatch for the Tervigon and give her a shot at a glorious death in combat, but she promptly failed her 6" charge. The Trygon had no such ill luck and slammed into the deamon prince. Once again, brain-lapse struck and I chose to fight the hormagaunt assault first, where they were promptly wiped out by the chaos lord, giving my opponent first blood. In the next combat, the daemon prince dealt the trygon a couple wounds before being sliced to ribbons - I realized afterward I should have used smash for ID, but regular attacks did the trick courtesy of some luck.
Turn 3:
The berserkers, who had gotten a 6" consolidation, high tailed it for my objective holding gants. The forgefiend finally killed the tervigon and the obliterators did a couple wounds to the Trygon. The berserkers shot down a couple gants, and then promptly failed their charge by less than an inch to contest my objective.
Bottom Turn 3:
With little left to do, and the game being called at the end of the turn, I put my flyrant into glide mode and moved the tervigon around to the other side of the woods with the objective, preparing to charge. In the shooting phase, the flyrant and trygon managed to kill two berserkers each, and then, in a cruel twist of fate, like the berserkers across the board, both failed their charge by less than an inch to contest the objective, even with the fleet re-rolls from the Trygon.
Results:
Draw: 4 - 4
Tyranids held 1 Primary Objective and had Linebreaker
Chaos held 1 Primary Objective and had First Blood
Coming soon; Round 3 vs. Eldar in a Killpoint game.


I like the maps.
ReplyDeleteReminds me of the old WD battle reports. Good to see another Tyranid fan.
Thanks, Thomas! Yeah, I think the old WD battle reports are definitely a guiding influence. I'm planning on also including a few photos for future games to compliment the maps.
Delete